
Planet Fitness is well-known for its fitness services, and on a daily basis number of people join Planet Fitness to maintain their health. Some people prefer to sign up by showing up at the gym while some struggle to sign up online. In this guide, we’ll let you in on the step-by-step process of signing up for Planet Fitness on their website. Let’s go.
What Is Planet Fitness?
Planet Fitness is a franchise of fitness clubs all over the USA and around the globe offering fitness services to its members in a judgment-free zone. They offer two different membership plans which let their members enjoy free fitness services and some extra amenities. But to avail of these services, you need to become a member.
Let’s see how you can sign-up for Planet Fitness.
How To Sign Up For Planet Fitness?
Signing up for Planet Fitness services isn’t a tough task, rather it’s quite a simple one if you can follow the 5 basic steps which include:
Location → Plan → Information → Payment → Checkout
Here, we’ve laid out a step-by-step process of signing up at Planet Fitness for you.
Step 1:
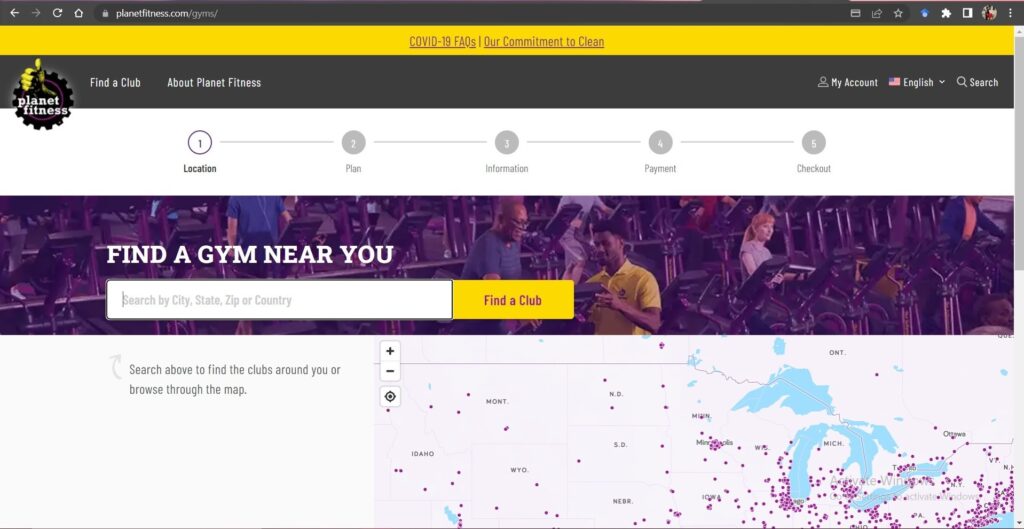
The very first step is to go to the home page of Planet Fitness (https://www.planetfitness.com/) and look for the “Join Us” option at the top right corner and click on it.

Step 2:
Once you click on Join Us button, you’ll be navigated to the page where you’ll have to select your nearest location or any location of the gym that you want to join. You can either search on the map given on the right side or you can simply type the name of the city, state, it’s zip code, or country to find your desired gym.
Step 3:
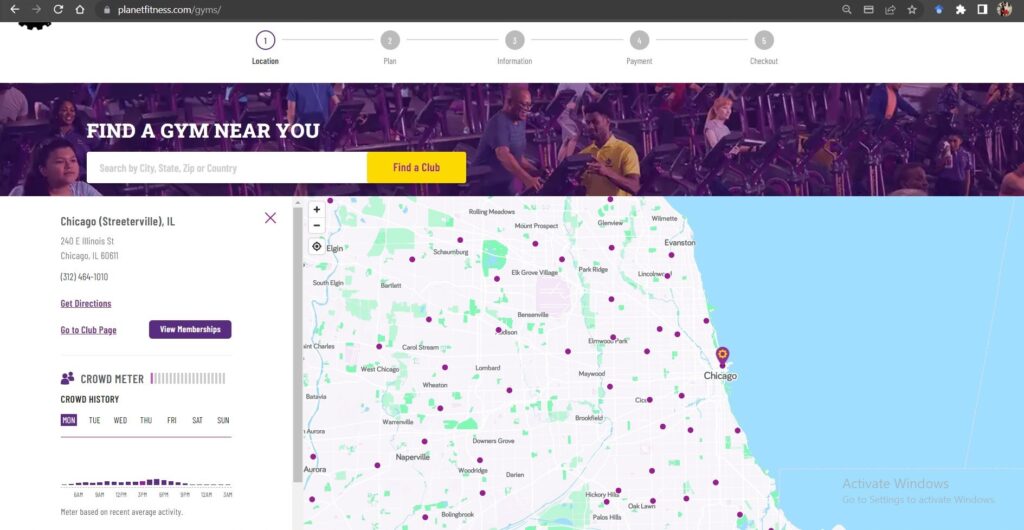
Here, we’ve selected a gym as an example from the map given, i.e., Planet Fitness (Chicago Illinois).
After selecting a gym, as you can see, it will show you it’s the exact location, its crowd meter, and the timings of the gym. To move further in the signing-up process, you need to click on “View Memberships”.
Step 4:
View Memberships’ button will take you to a page where you can see all the available pricing plans at that specific gym you’ve chosen for registration. Here in this example, you can see you have three options to choose from including PF Black card membership, Classic membership, and Paid in full. All the plans here are mentioned with all the necessary details. After deciding carefully, you need to select the kind of membership you are willing to take. We’ll be choosing Classic membership for this guide.
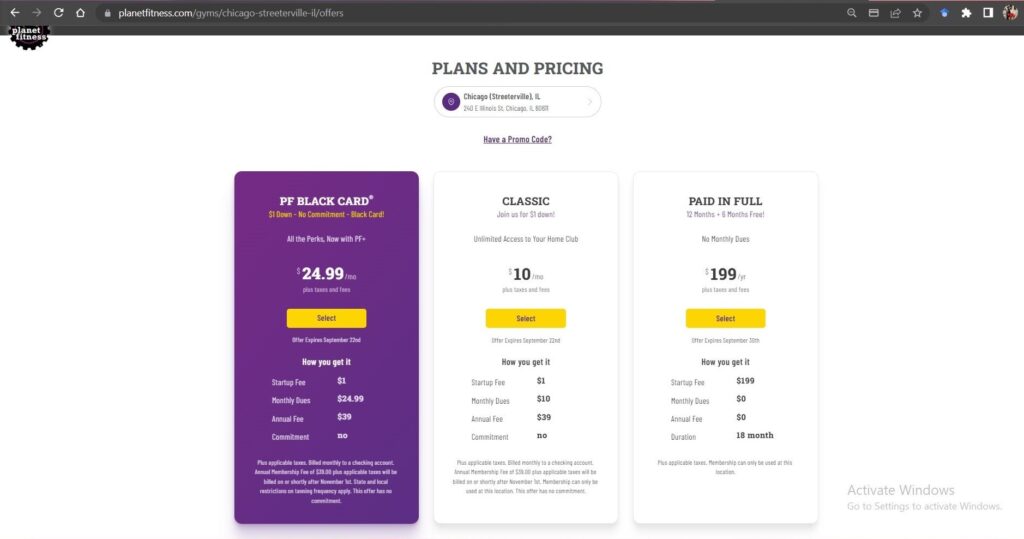
To choose your membership plan, click on the “Select” button under the respective pricing plan.
Step 5:
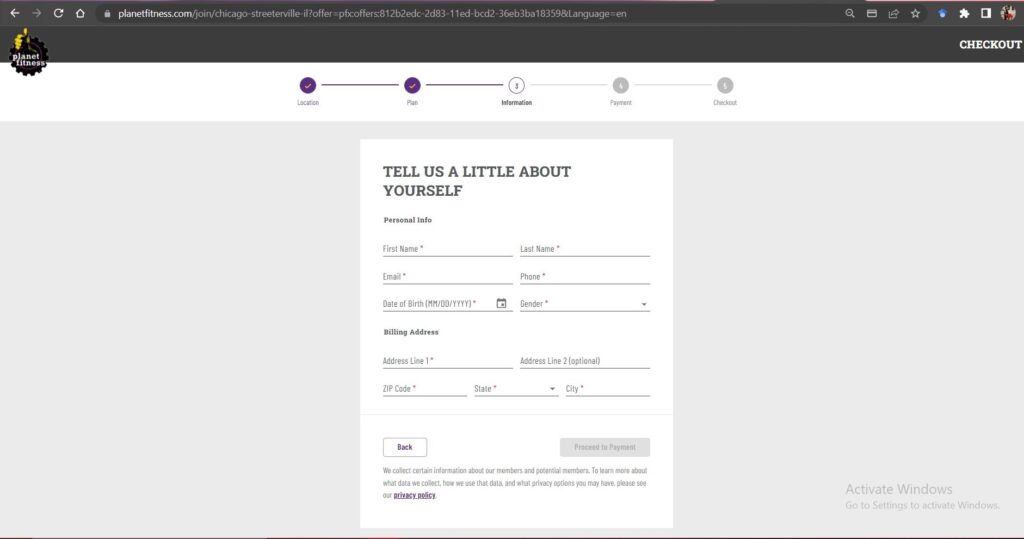
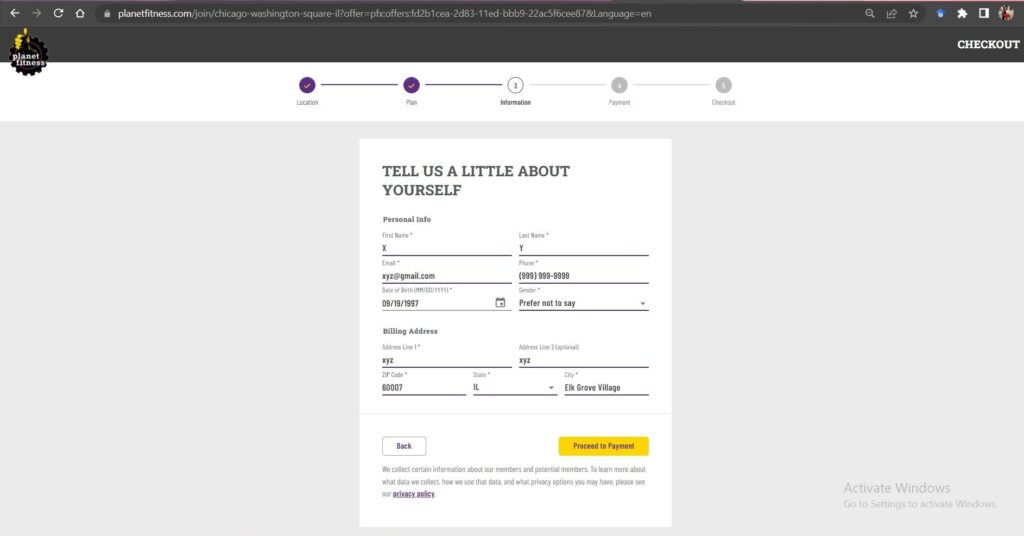
Right after selecting your membership plan, you’ll be navigated to a page where you’ll be asked to provide some personal and very basic information. The page will appear as shown here in the image below.
Step 6:
We’ve filled this information page with the supposed information just for reference. An asterisk over a certain field means it is mandatory information without filling which you cannot proceed further. After filling in personal information, you need to provide your billing information which requires you to add your address. Here, we’ve added a sample address. However, you need to provide all the details correctly otherwise you won’t be able to sign up.
After filling in all the information, click on the “Proceed to Payment” button that appeared in the right bottom corner.
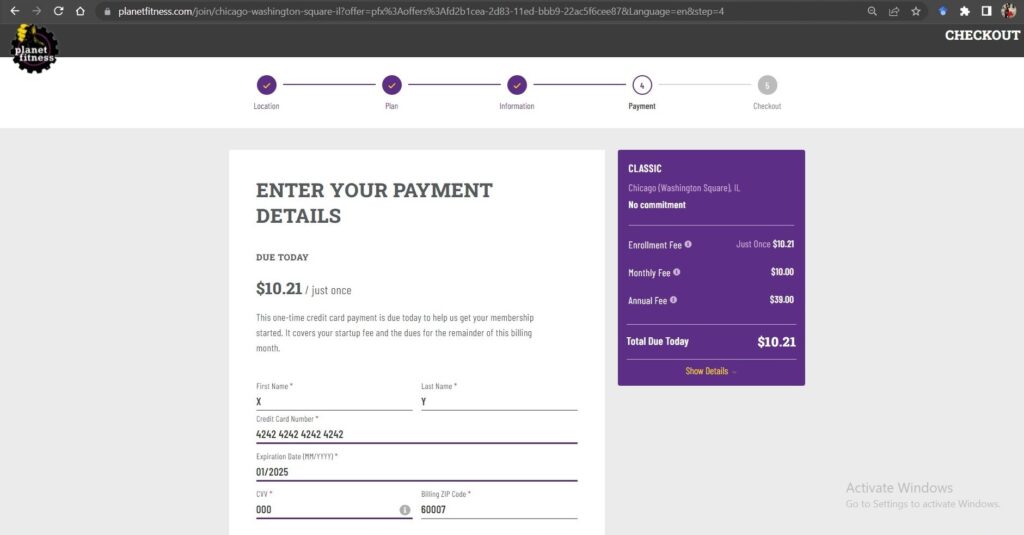
Step 7:
Proceeding to payment will take you to a form where you need to add your payment details. On this page, you’ll find all the payment details related to your membership plan. The fee mentioned at the start “$10.21” is the start-up fee that is mandatory to be paid to initiate your membership plan.
This page has two forms in which you need to fill out all the required details in a correct manner. The first form requires you to add your credit card details including its number, expiry date, CVV, and billing zip code. Here in the image below, we’ve added sample values. You need to put the correct details of your valid credit card.
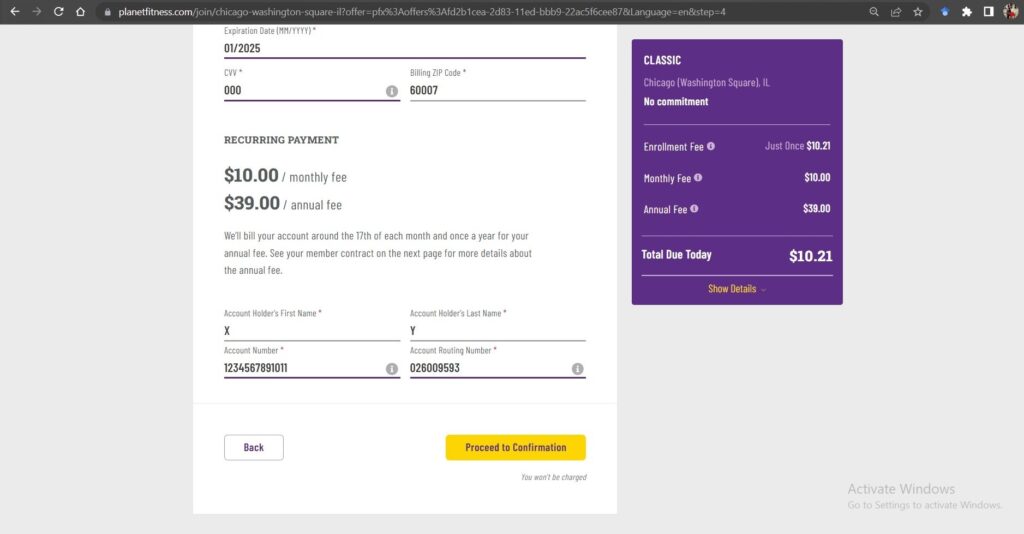
Step 8:
The second half of the form mentions the amount of monthly and annual fees associated with your selected plan. It also mentions the dates on which the deduction will be made by Planet Fitness. Here, Planet Fitness requires you to add the Account Holder’s first and last name, along with the account number and the account routing number, which is mentioned on the checkbook of the account holder.
Once you put all the details, you’ll see an option of “Proceed to Confirmation”. Click on it to move further.
Step 9:
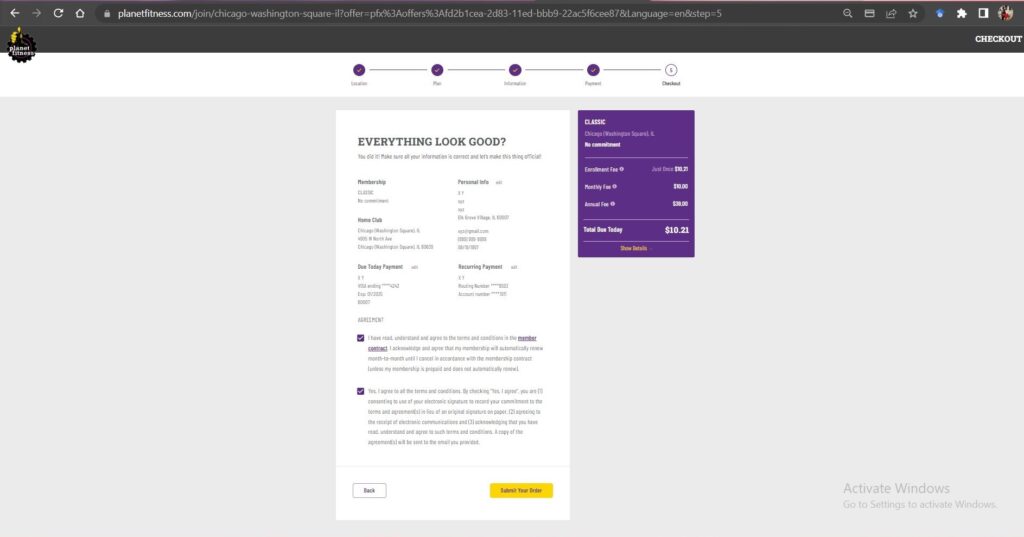
It’s time to check out, but before that, you’ll be asked to recheck your details to avoid any mistakes. You’ll also be presented with the conditions of the “member contract” with which you have to agree to finish signing up.
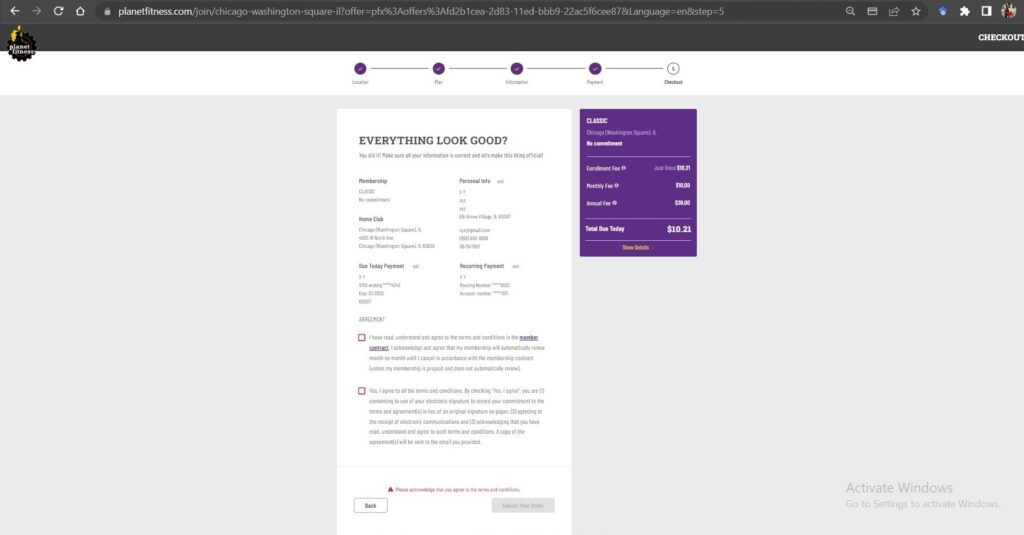
Step 10:
After checking the boxes under the “Agreement” section, you’ll be presented with the option of “Submit the Order”. Once you click it, you’ll be directed to thank you page where it will be mentioned that your membership will be confirmed soon. You’ll be notified about the membership details via email.
The Final Word
Signing up at Planet Fitness on their website is a simple process in which you need to fill required details in four sections including location, plan, information, and payment before checking out. This guide has been designed to make your signing-up process at Planet Fitness smooth and easy. Hope you find it helpful.

I look up to fitness as a lifestyle and love to pen down about it. I have 2 years of experience in content writing and I am here to share my research and knowledge on health and fitness.